Tip: Hosting 100MB video on Google Pages
When Google Pages was announced, I signed up for beta testing, hoping that the 100MB of storage would solve some of my smaller video hosting needs. Unfortunately each file is limited to 9MB in size (Google says 10MB, but my downloads fail unless the files are significantly smaller). That's too small for me.
Now I ain't knocking Internet Archive, Google Video, MySpace and YouTube. They're all excellent services. But they have various verification processes which result in a delay before your video goes live, and they all have restrictions on what footage is considered acceptable. All but Internet Archive convert your original footage into their proprietary formats for their custom media players.
I want to:
The best solution I've found is creating a QuickTime "Reference Movie". This is an extremely small QuickTime file containing only pointers to movie data which can be dispersed across a number of 9MB files. But, the QuickTime Reference Movie can be used in video editing packages, and saved completely to a user's hard drive.
Requirements:

The files need not be 9MB, any size smaller is fine. They need not be the same size. Your main consideration is making sure you don't render the same frames twice at the start and end of your chunks.
If you're using a PC you'll have to specify we're exporting a QuickTime movie. While good codecs choices are MPEG-4 or H.264, we must be sure to render these in a QuickTime file format. While QuickTime can play raw MPEG-4 (.MP4) and H.264 files, we won't be able to reference them in our master file. Too bad, since 3rd party codecs are often superior to Apple's (such as MainConcept's excellent H.264 codec).
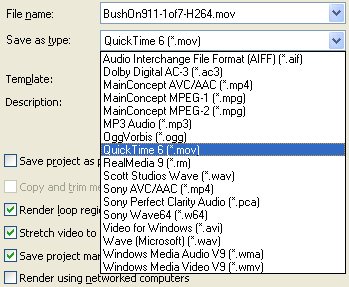
Here I've already specified QuickTime, and am now specifying Apple's H.264 codec.
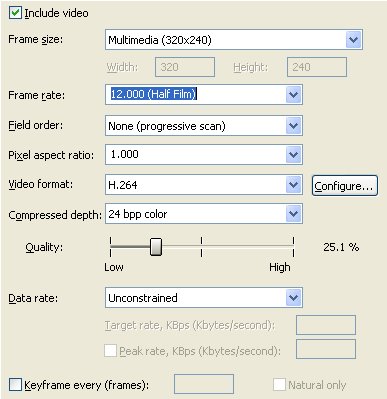
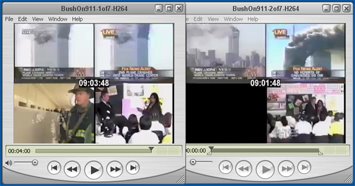
Once you've rendered out your chunks of video, try creating a test Reference Movie. Open your first 2 QuickTime movies simultaneously. On the seconds quicktime movie, hit CTRL-A then CTRL-C to put the second movie chunk into clipboard.
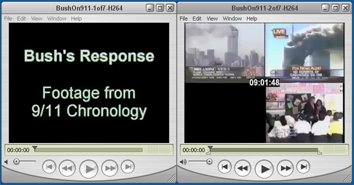
Switch to the first QuickTime movie, and move the slider to the (right) end of the first movie's timeline. Note the first movie's length.
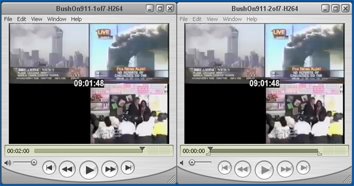
Then (still in first QuickTime movie) hit CTRL-ALT-V to "Add to Movie" (different from Paste). The first movies duration should have approximately doubled (depending on how evenly divided you rendered portions of your video project).
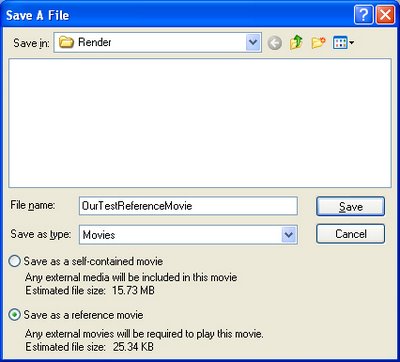
Use "Save As" to save the first QuickTime player's contents as a Reference Movie. Give it a different name from all your existing movie portions.
Now this test QuickTime Reference Movie will only play on your computer, since the Reference Movie looks to your local box for the component videos. But if you've gotten this far, and the video plays, its just a matter of repeating the process with QuickTime files hosted on Google Pages. Close all your copies of QuickTime.
Upload all your video portions (except your test Reference Movie file) to Google Pages. My example also contains a single Windows Media video file. I haven't yet figured out how to repeat this process with Windows Media, so for now I'll be also letting visitors to my page download a very-low-quality Windows Media copy of my video as well.
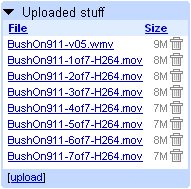
Once they're uploaded, you can open them all back up... but from Google Pages and NOT your hard drive. Google Page's "Uploaded Stuff" list features live links, so a right-click and "Copy link location" in Firefox will put a video link's URL into your clipboard. Open every video using QuickTime using QuickTime's File, Open URL command. Open them all up, one at a time (I've found some downloads stopped on my machine if I opened too many at once).
Your desktop should look like a bloody mess.
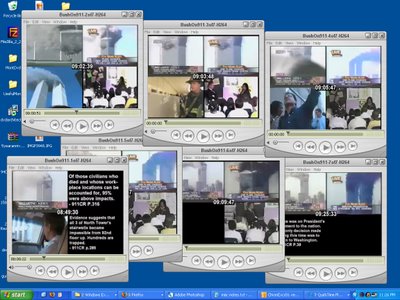
Starting on the second player, CTRL-A, CTRL-C. Go to first player. Move slider to end of timeline. CTRL-ALT-V.
Go to third player, CTRL-A, CTRL-C. Go to first player. Move slider to end of timeline. CTRL-ALT-V.
Repeat until you've added all the segments to first player.
Save contents of first QuickTime player as a reference movie.
Upload the reference movie to Google Pages. Its the reference QuickTime file to which you'll add a hyperlink on your web page.
Test the video, have your friends test the video. Biggest concern is you've got a reference to a video file on your own hard drive somewhere in the QuickTime Reference Movie, so be sure to test on computers which are not your own.
Hope this approach is of help to people, and please let me know of any improvements you might have, or additional solutions for video hosting.
The spash page for my test project can be found at CalmReflection.Com. As of this moment, the "Bush's Response to 9/11" QuickTime link is the only Reference Movie found on the page.
Now I ain't knocking Internet Archive, Google Video, MySpace and YouTube. They're all excellent services. But they have various verification processes which result in a delay before your video goes live, and they all have restrictions on what footage is considered acceptable. All but Internet Archive convert your original footage into their proprietary formats for their custom media players.
I want to:
- Upload a video and start sharing it right away.
- Let others download footage in the same format I uploaded it.
- Upload "fair-use" clips which preclude Creative Commons licenses and Internet Arhive hosting.
- Not worry about bandwidth (granted none of the other services here cap downloads).
The best solution I've found is creating a QuickTime "Reference Movie". This is an extremely small QuickTime file containing only pointers to movie data which can be dispersed across a number of 9MB files. But, the QuickTime Reference Movie can be used in video editing packages, and saved completely to a user's hard drive.
Requirements:
- Original video project. We want to render our 9MB files from scratch, or else we'll lose quality to recompression.
- QuickTime Pro 7. "Pro" lets us copy smaller QuickTime movies into a master QuickTime movie as references. "7" lets us use Apple's H.264 codec.
- Google Pages account. They're not offering any new accounts at the moment, but you can always sign up to be put in the queue.

The files need not be 9MB, any size smaller is fine. They need not be the same size. Your main consideration is making sure you don't render the same frames twice at the start and end of your chunks.
If you're using a PC you'll have to specify we're exporting a QuickTime movie. While good codecs choices are MPEG-4 or H.264, we must be sure to render these in a QuickTime file format. While QuickTime can play raw MPEG-4 (.MP4) and H.264 files, we won't be able to reference them in our master file. Too bad, since 3rd party codecs are often superior to Apple's (such as MainConcept's excellent H.264 codec).

Here I've already specified QuickTime, and am now specifying Apple's H.264 codec.

Once you've rendered out your chunks of video, try creating a test Reference Movie. Open your first 2 QuickTime movies simultaneously. On the seconds quicktime movie, hit CTRL-A then CTRL-C to put the second movie chunk into clipboard.

Switch to the first QuickTime movie, and move the slider to the (right) end of the first movie's timeline. Note the first movie's length.

Then (still in first QuickTime movie) hit CTRL-ALT-V to "Add to Movie" (different from Paste). The first movies duration should have approximately doubled (depending on how evenly divided you rendered portions of your video project).

Use "Save As" to save the first QuickTime player's contents as a Reference Movie. Give it a different name from all your existing movie portions.

Now this test QuickTime Reference Movie will only play on your computer, since the Reference Movie looks to your local box for the component videos. But if you've gotten this far, and the video plays, its just a matter of repeating the process with QuickTime files hosted on Google Pages. Close all your copies of QuickTime.
Upload all your video portions (except your test Reference Movie file) to Google Pages. My example also contains a single Windows Media video file. I haven't yet figured out how to repeat this process with Windows Media, so for now I'll be also letting visitors to my page download a very-low-quality Windows Media copy of my video as well.

Once they're uploaded, you can open them all back up... but from Google Pages and NOT your hard drive. Google Page's "Uploaded Stuff" list features live links, so a right-click and "Copy link location" in Firefox will put a video link's URL into your clipboard. Open every video using QuickTime using QuickTime's File, Open URL command. Open them all up, one at a time (I've found some downloads stopped on my machine if I opened too many at once).
Your desktop should look like a bloody mess.

Starting on the second player, CTRL-A, CTRL-C. Go to first player. Move slider to end of timeline. CTRL-ALT-V.
Go to third player, CTRL-A, CTRL-C. Go to first player. Move slider to end of timeline. CTRL-ALT-V.
Repeat until you've added all the segments to first player.
Save contents of first QuickTime player as a reference movie.
Upload the reference movie to Google Pages. Its the reference QuickTime file to which you'll add a hyperlink on your web page.
Test the video, have your friends test the video. Biggest concern is you've got a reference to a video file on your own hard drive somewhere in the QuickTime Reference Movie, so be sure to test on computers which are not your own.
Hope this approach is of help to people, and please let me know of any improvements you might have, or additional solutions for video hosting.
The spash page for my test project can be found at CalmReflection.Com. As of this moment, the "Bush's Response to 9/11" QuickTime link is the only Reference Movie found on the page.


<< Home